
Cooking has become something I’ve come to really appreciate and enjoy over the last year or so. My mother has been the family cook and was often the one to prepare food for the table. My father would also help on some occasions and was the family’s resident meat grilling expert. My brother also took up cooking while in college thanks to religiously following Gordon Ramsay at the time, and I wound up being the last in the family to start up cooking not only as a hobby, but also as a loose way of life.
When my parents left for Taiwan last January, it was to be routine. They had always gone back for Chinese New Year and would return sometime during the spring. However, we all know what happened a couple months later and they’ve been stuck overseas while I’ve been looking out for myself here in Boston. What I meant by saying that cooking was “a loose way of life” is that I had to effectively learn how to cook more than the few dishes that I knew at the time. I couldn’t just keep ordering food or go to get take out or delivery: I had to learn how to fend for myself and provide something for myself to eat.
Luckily for me, I had learned some things from my mother and knew a few ins-and-outs of picking groceries. Over the last few years I’ve always enjoyed a trip to the supermarket and just exploring the various items that I might find at every place I go. My go-to place is the H-Mart in Cambridge thanks to the plethora of Asian goods that they provide along with the quality of the products.
I’ve mentioned my mother numerous times as you might have noticed, because I feel I attribute my interest in cooking from her. She learned much of her cooking repertoire from her mother and my grandma on my dad’s side, but she continued to learn new recipes from our family friends in order to share them with us, as well as taking cooking classes abroad. In October 2014, she flew to Florence for a month to learn some Italian cooking, and then to Kyoto in October 2017 to learn additional Japanese dishes.
In terms of recipes I knew prior, I knew of how to cook a Japanese dish known as “Oyakodon (親子丼)” as my mother had sent my brother and I the recipe she got from Kyoto. I began to try it out and have been continually refining it, to the point where I wrote down my own version of the recipe.
The thing with Oyakodon that I particularly enjoy aside from the flavor is the poetic nature of its name. The primary ingredients of the dish aside from the rice are the chicken and egg. “Oyako (親子)” refers to “parent” and “child”, which is an analogy to the chicken and egg present in the dish. The dish was first served at the restaurant Tamahide (玉ひで) which remains open today in Tokyo.
There is, however, a loose variation of oyakodon that features one difference in the protein: “Katsudon (カツ丼)”. The difference is that instead of chicken, the dish uses a deep-fried pork cutlet, referred to as “tonkatsu (豚カツ)”. Sometimes, a deep-fried chicken cutlet is used. Regardless, the dish is popular among the youth in Japan, and it has become somewhat of a tradition to eat the dish prior to a major test or entrance exam due to “katsu” being a homophone for the verb “katsu (勝つ)”, which means “to win”.
Anyway, I’d like to get to how I cook the two dishes because the process is very similar.
Recipe for Oyakodon and Katsudon
Ingredients:
0.5 cup of dashi (出汁/だし)
1.5 tsp of soy sauce
1.5 tsp of light-colored soy sauce (NOTE: there is a difference)
1 tbsp of mirin (味醂/みりん)
1.25 tsp of sugar
Dash of salt (up to .25 tsp)
~0.25 onion or ~1 shallot, chopped into thin slices
2 eggs
1 medium bowl of rice
Ingredients specific to Oyakodon
1 Chicken Thigh
Ground pepper (for garnish, optional)
Touch of mitsuba (for garnish, optional)
Ingredients specific to Katsudon
1 Pork or Chicken Cutlet
2-2.5 tsp flour
2.5-3 tbsp panko (Japanese bread crumbs)
1 stalk of scallion, minced (for garnish, optional)
Note: Amounts vary based on size of cutlet
Note: “a” denotes a step for Oyakodon, “b” for Katsudon
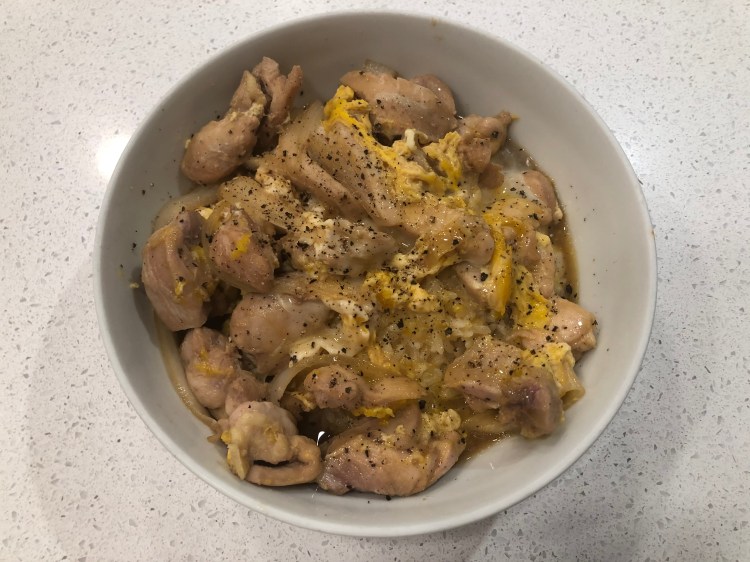
0a) If going for Oyakodon, chop the chicken into thin slices and/or bite-size pieces.
0b) If going for Katsudon, flatten the cutlet with a meat hammer, then coat it with the flour. Afterwards, beat one of the eggs and have it coat the cutlet (IMPORTANT: save whatever remains of the beaten egg!). Next, coat the cutlet in the panko. Afterwards, you may choose to either deep-fry or pan-fry the pork cutlet. Once cooked, cut the cutlet into pieces, but do not cut all the way through in order to maintain shape for later.
1) Over low-medium heat in a small or medium skillet, combine the dashi, soy sauces, sugar, and salt, and bring to a simmer.
2) Add the onions and reduce to the lowest heat setting. Cook the onions until they are soft and have absorbed the broth.
3a) Add the chicken, turning pieces periodically to ensure all are properly cooked.
3b) Place the cutlet with the side you cut into away from the skillet. Then, pour the beaten egg from before onto the cutlet.
4a) Beat one of the eggs and add to the skillet, distributing the mixture evenly.
4b) Flip the cutlet, then beat another egg and pour onto the cutlet.
5a) Shut off heat, then add the other egg, also beaten.
5b) Flip the cutlet once more and shut off heat.
6) After about 30 seconds, “move” the ingredients onto the bowl of rice, making sure to distribute the ingredients properly and maintaining the shape from the skillet. At this point, you may choose to add the optional garnish. Otherwise, your dish is ready to serve!
